
Help
Introduction - Enfold
Enfold Theme
The Enfold Theme has been installed for to enable very easy Maintenance of the site
- Enfold has lots of tools to be used in the website, without having to code
- All tools available are “drag and drop”, all tool settings are “drop down” and “tick boxes”
Do NOT change the Enfold Theme on the website, as all pages will become unusable after you remove the Editing Tools
Advanced Layout Editor
When you create a new “Portfolio Item” (or “Page”, or “Post”), after you typed in the Title, ALWAYS select “Advanced Layout Editor”
You always will be using the “Avia Layout Builder” as shown below

Page Types Used
Page Types Used
In WordPress you can create
– Posts ( not used )
– Forms ( we use Gravity Forms, as before )
– Pages ( most pages are static “landing pages” which require little or no maintenance )
– Portfolio Items ( optional, not used yet, can be used for news and info pages, to be displayed in grids )
How to: UNDO
How to: UNDO
The short answer is: there is no undo like in a normal application
A practical work around is to EXIT editing the element and EXIT the page (go to another page), WITHOUT SAVING the changes.
Tip:
– Make changes to your website in small steps
– When change is, OK, always update the page
This way, when you “loose content”, you only loose a little bit
How to: Avia Layout Builder explained
Avia Layout Builder explained
Golden rule:
- FIRST select / drag container
- SECOND select / drag “content” ( text or image )
The “Avia Layout Builder” is the “maintenance core” of the website. All pages are built and maintained using this tool.
If you look at the “Avia Layout Builder” you see three “Tabs” at the top
Normally you work your way through from left to right
1.. “Layout Elements”
Think of “layout Elements” as containers; Place holders, from full page width (“1/1”) to small (“1/5”)
As a rule you
- drag down and drop your “container” into your page
- Insert, drag and drop, a content element ( text or image or other ) into the container
2.. “Content Elements”
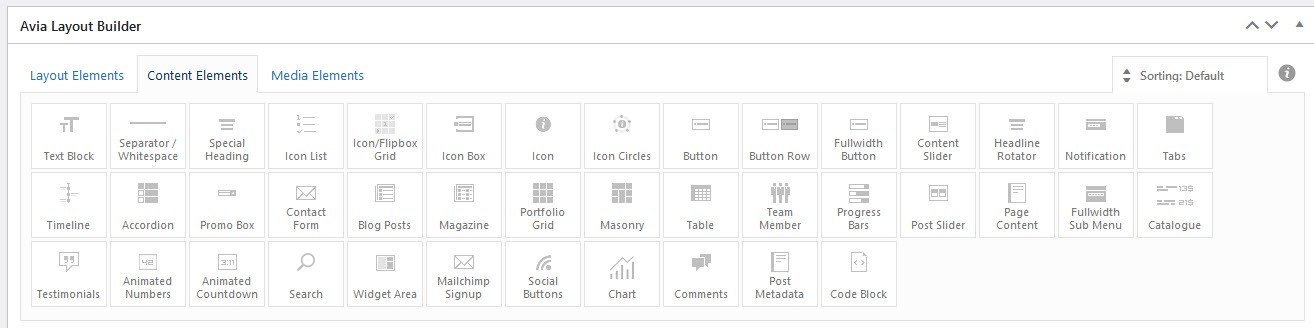
There are many “Content” elements, but the most used are in the top left corner. Most elements are related to textual content
3.. “Media Elements”

The “Media” elements are Images and slide show related
The most used elements are “Image” and “Fullwidth Easy Slider”
How to: Maintain any page
How to: Maintain any page
1. Login as administrator
2. Using the menu at the top to navigate to the page ( or use the back-end page option)
3. Black menu on the top, close to the centre, click on “Edit (Page or Portfolio Entry) – (Advanced Layout Builder)”
4. This will bring you to the page editor
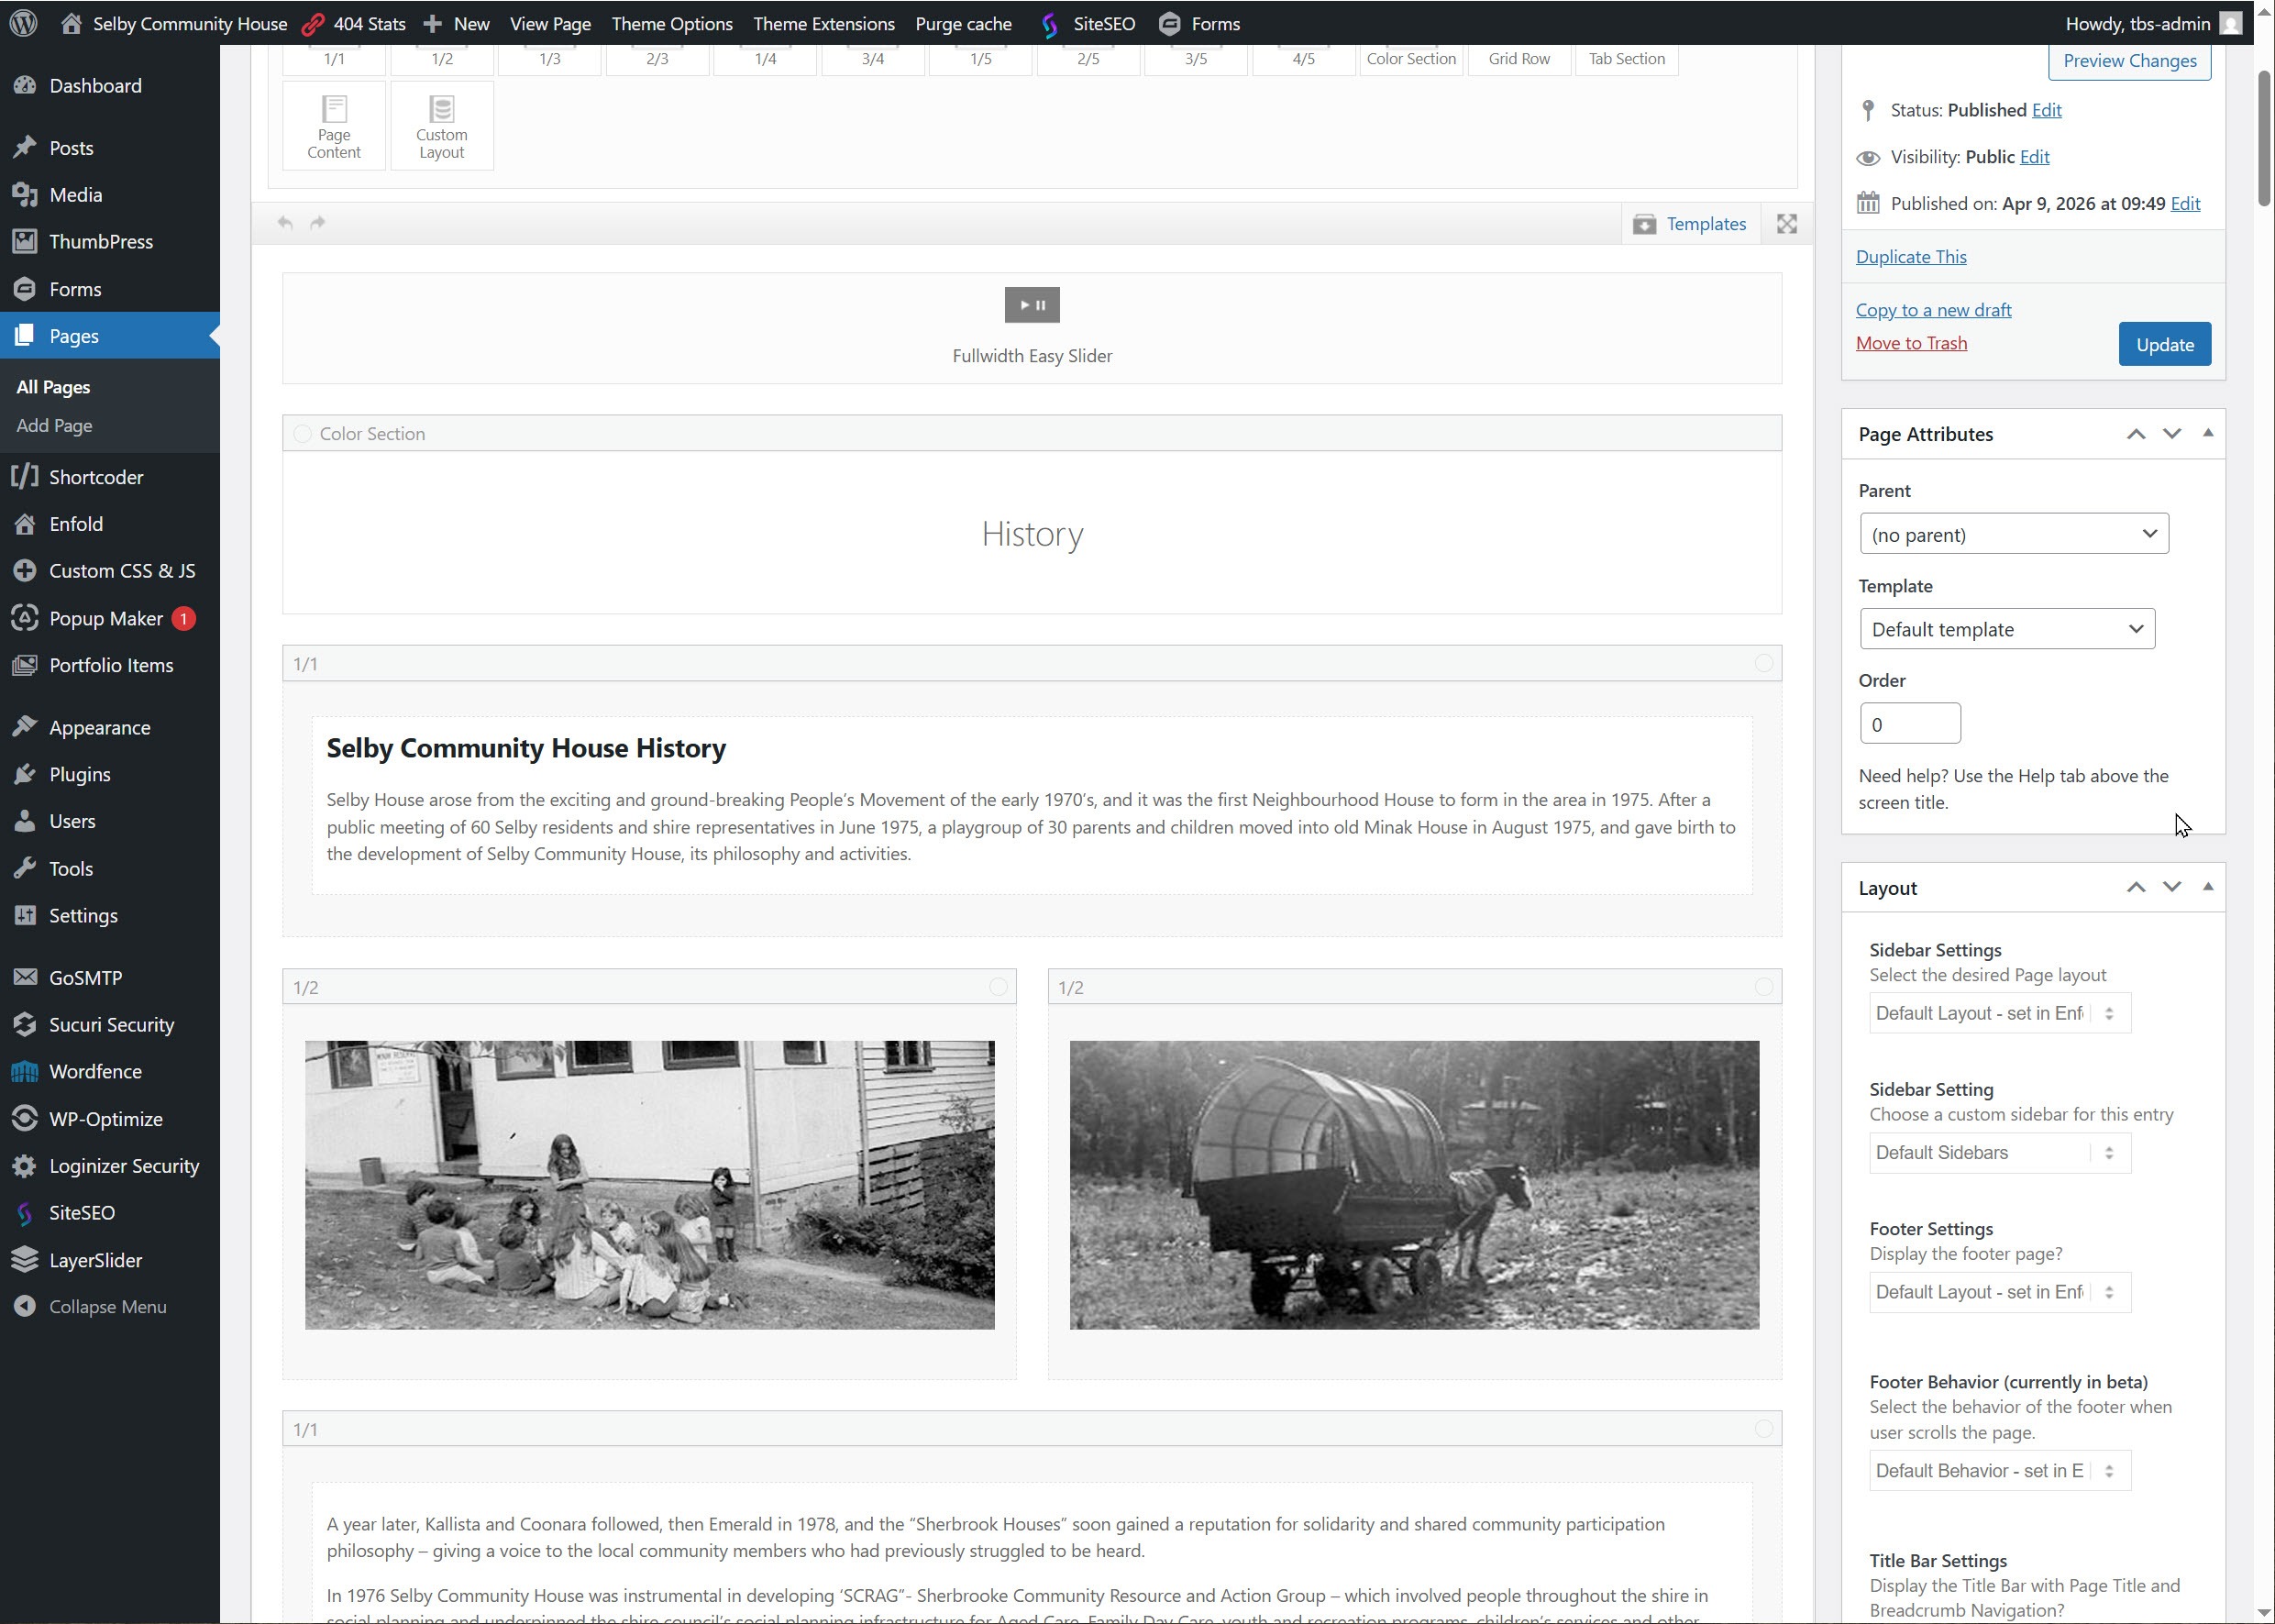
You see all the containers and content
Click on “Image” or “Textual Content” or “other content” to change
Important After the change
1. Click on “Save” ( blue button) at right bottom of your element
2. When done ALWAYS click on the blue “Update” button, right hand side of WordPress, to upload to the server
How to: Images Name Convention
How to: Images “Name Convention”
It’s important that images have the correct “meaningful name”
Without a “Name Convention – System”, image names will be “random” and “hard to find” for you and other people
Below is a “best practice” name convention system, that is proven to “manage” thousands of images
Example:
“MelbourneSunset-015_1200x560_v01.jpg”
- MelBourneSunset => No spaces, Words Capitalised for easy reading
- -015 => Number ‘015’ ( allows for 999 images with same Description and still be unique )
- _1200x560 => image is 1200 pixel wide and 560 pixels high
- _v01 => version ’01’, allows for 99 versions
- It is a “jpg” file
Notes:
- Use “jpg” for images with NO transparency
- Use “png” for images with transparency
- DON’T use any other image formats ( like webm, tiff etc )
Different sizes of SAME image ( crop )
- The SAME image can be created in other “cropped” versions e.g. square
- Name of image would be “MelbourneSunset-015_560x560_v01.jpg”
Similar but different Image
You can have another similar image called: “MelbourneSunset-016_750x820_v01.png”
- Also an image of Melbourne Sunset, but a different image, different
- size “750×820” pixels
- “png” => contains transparency
WordPress and “Image version numbers”
- WordPress does NOT like an image to be re-uploaded with the same name ( caching issues )
- correct procedure is to 1. delete the image to be replaced 2. prepare replacing image 3. upload in WordPress
- The image prepared will have a new “version” number => v02 etc
- Example: firstly uploaded image is Too Dark or Unsharp etc
How to: Image sizes
How to: Image sizes
It’s important that images are uploaded in the correct size
We resize images OUTSIDE WordPress, using Paint.Net or other program
With the external image editor we resize, sharpen and correct light or dark if needed
Enfold images
- Slideshow: 1500 x 630
- Gallery: 632 x 400
- Any “stand alone” image: width needs to be between 500 and 700
Social Planet images
- ALL images need to be of size: 1024 x 680
How to: Social Planet integration
How to: Social Planet integration
The page”classes” automatically shows all the courses available in a given Term
How does it work?
- all classes / courses / activities are “activities” in Social Planet
- In order to be visible in WordPress, status of the Activity in Social Planet needs to be “Published”
- All images, descriptions, booking and pricing info in Social Planet need to be ready in Social Planet
- For flexible switch ON / OFF ( Activity status Published or Not ), there will be a course activity for each term
- Social Planet replaces all Bookings, Payments and Calendars previously in WordPress
- For now, all different courses are presented in a single grid
How to: Images Prepare and Upload
How to: Images Prepare and Upload
It’s important that images are uploaded in the CORRECT SIZE
Images are prepared OUTSIDE WordPress, using Paint.Net or other program before uploading
With the external image editor we
- resize / crop
- sharpen
- correct light or dark
- save with a “meaningful name”
Only when this is done we
- upload the image by dragging it into the Media page
- Provide an image category, to be able to search and filter
How to: Duplicate a page
How to: Duplicate a page
text here
- click on duplicate
- edit duplicate, but change permalink, and edit course further
How to: Change an image
How to: Change an image
Steps
In edit mode
- Prepare your image ( e.g. 700 x 500 px ) and upload it into the Media Library
- On the page, select container with image to change
- Click on image and Click again on the image to go to the Media Library
- Select new image from the Media library
- Click on the blue button at the bottom of the element to confirm your change
- Don’t forget to Update your Page ( = WordPress, blue button on the right hand side )
Image size
We optimized the website for maintenance.
Inside all courses and news posts we use a single image: size 750 x 500 px, format “.jpg”
The positions of the image are:
- Close to the top of the page, inside a container
- As a “Featured Image” = right hand side, down, using standard WordPress feature
Update a pdf Policy in an icon list
An icon list is a special click able list (of pdf’s) with an icon in front
Step 0:
Login as Administrator to be in “edit Mode”
Step 1:
Create the Policy PDF and upload the pdf into Media .library
Make sure the file name of the pdf is always unique => use a version number in the file name
e.g. “Policy 35…. _v01.pdf” (an update of the policy would be “Policy 35…. _v02.pdf”
Step 2:
Uploaded in Media library, go to the pdf and copy the URL to clipboard
Now you have the link to the pdf
Step 3:
Go to the Page or Portfolo which contains the icon list
e.g. https://www.andnext.net.au/childcare-policies-procedures/
Step 4:
Go to the Policy page

Click on Edit The Page

Click on the Icon List to Edit

Click on the Icon List Item to Edit

Edit Name if needed
Go to the Advanced TAB, to the Link Session ( clear the link if needed ) and paste in the copied pdf link

Save icon list, save and Update Page
How to: Explain Portfolio Grids
How to: Explain Portfolio Grids
On the website we use Portfolio Items for
- Courses
- Skills Sets
- Traineeships
- News Items
- Job vacancies
- Trainers
On various pages we use “Portfolio Grids” to visually display filtered and sorted contend
Portfolio Grids used are:
- Community Programs – courses
- Employment Skills – courses
- English Classes – courses
- Qualifications – courses
- Reconnect Program
- Technology – courses
- Trainers overview
- News Items
- Job vacancies
How to: Change Portfolio Grid columns
How to: Change Portfolio Grid columns
Important:
Do NOT change the “Content” settings of any Portfolio Grid as it will change / destroy its behaviour.
The ONLY thing to be safe is the amount of columns displayed.
When done, click the blue “Save” button and don’t forget to “Update” the page

How to: Maintain News items
How to: Maintain News items
News Items are “Portfolio Items” with the Category “News” selected and showing up on the “Home” page under “News” as well as on the page “More News”
Example:
To put a course into “News”
- You select an existing course (being a Portfolio Item) or
- Create a new course (being a Portfolio Item)
- and tick the box “News” Category and update The Portfolio Item
Removing “News” is as simple as un-ticking the “News” category
How to: Create a new Portfolio page
How to: Create a new Portfolio page
text here
- add new or
- duplicate existing Portfolio
How to: Portfolio Category
How to: Portfolio Category
The Theme Enfold adds “Portfolio Items” to WordPress
A Portfolio Items is like a cross between a WordPress “Page” and a WordPress “Post”
Portfolio Items can have “none”, or “one” or “multiple” Portfolio Categories
Portfolio Items can be displayed in “Portfolio Grids”, filtered by “one” or “more” Portfolio Categories
Maintain Portfolio Categories
On the Dashboard go to “Portfolio Items” / “Portfolio Categories” where you can
- Add, Change, Delete Portfolio Categories
Portfolio Categories, show up on the right hand site of the Portfolio Item in Edit mode
You can select “None”, “One” or “Multiple” Categories
After (Un)-Selecting and Updating the Portfolio Item, they will automatically (Dis)-Appear in the various Portfolio Grids on the website
Note:
When you Delete a portfolio Category, the Portfolio Grids using that Category can no longer display the content
How to: Image category